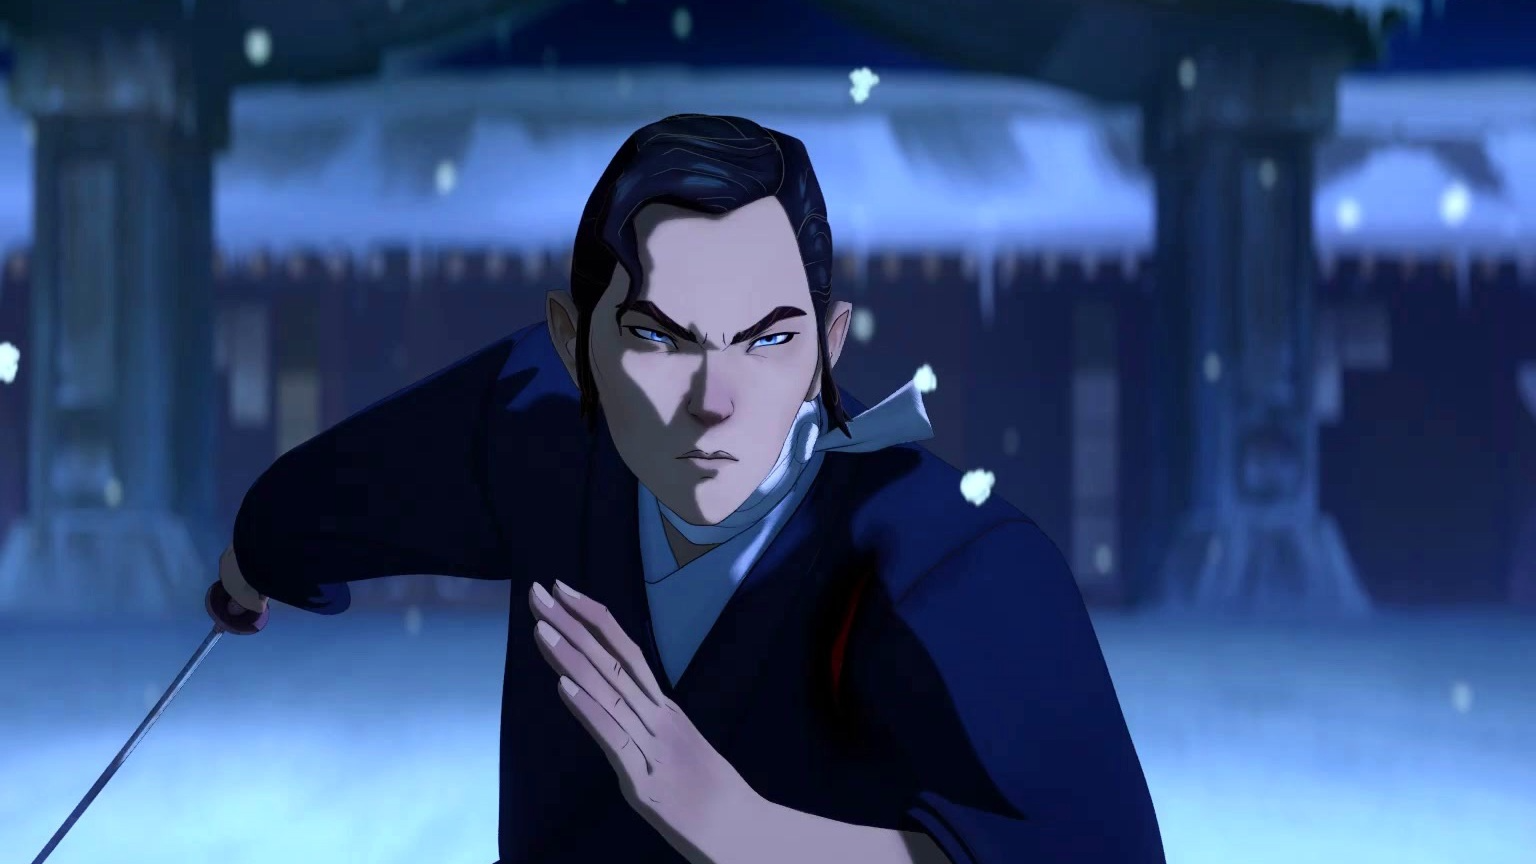
How To Make A Blue Eye Samurai Hat - A Craft Guide
Have you ever looked at a beautifully crafted samurai hat, perhaps from a historical depiction or a striking piece of animation, and thought, "I really wish I could make something like that?" Well, you're in for a treat because creating your own striking headwear, especially something as distinctive as a "Blue Eye Samurai" hat, is totally within reach. It's a creative pursuit that brings together a sense of history with your own personal touch.
- How To Measure 2 5 Teaspoon
- Ebony Sock Worship
- Bourguignonne Melting Pot
- Different Strokes For Different Folks Future
- Ryan Taugher Apology
Building one of these hats is, in a way, a delightful project that lets you explore a bit of traditional artistry while also putting your own spin on things. You don't need to be a master artisan to get started, you know, just a bit of patience and a willingness to try new things. We'll walk through the process, helping you understand each part of bringing this unique piece to life.
This guide will show you how to fashion a hat that captures that iconic look, focusing on those cool blue elements. It’s about making something that feels genuinely yours, something you can wear with pride or simply admire as a testament to your own handiwork. So, let's get ready to make something pretty special, a blue eye samurai hat that stands out.
Table of Contents
- What You'll Need for Your Blue Eye Samurai Hat Project
- Getting Started - Prepping Your Blue Eye Samurai Hat Base
- Adding the Color - How to Make Blue Eye Samurai Hat Look Authentic
- Decorating Your Blue Eye Samurai Hat - What Details Matter?
- Putting It All Together - Assembling Your Blue Eye Samurai Hat
- Tips for a Great Blue Eye Samurai Hat
- Troubleshooting Your Blue Eye Samurai Hat - What If Things Go Wrong?
- Cardi B Plastic Surgeon Dominican Republic
- Cat Sitting Gay
- Ryan Jesse Wife
- Just Gimme My Money Original
- Cheez It Recall
What You'll Need for Your Blue Eye Samurai Hat Project
Before you even think about cutting or gluing, it's a pretty good idea to gather everything you might need. Having all your bits and pieces ready makes the whole process smoother, really. You don't want to be halfway through shaping your hat and then realize you're missing a key item, do you? That just slows everything down. So, let's look at what sorts of things you'll want to have on hand to make your blue eye samurai hat.
Essential Materials for a Blue Eye Samurai Hat
For the main body of your hat, you'll want something sturdy but also shapeable. Think about materials like heavy-duty craft foam, perhaps EVA foam if you can find it, or even thick felt. These materials give you a good base that can hold its form once you've worked with it. Cardboard could also work, especially if you plan to reinforce it later. The goal is a material that will support the structure of your blue eye samurai hat.
To get that distinctive blue color, you'll need paint or fabric dye. Acrylic paints are a good choice because they dry quickly and offer a wide range of shades. If you're using fabric, a fabric dye will give you a more even and lasting color. Consider a deep, rich blue, or maybe a slightly lighter, almost sky-like shade, depending on the look you're going for with your blue eye samurai hat.
For the "eye" part, which is a key feature of your blue eye samurai hat, you might want a contrasting material. This could be a different shade of blue fabric, a piece of shiny vinyl, or even a metallic paper. The idea is to make this element stand out visually, perhaps catching the light in an interesting way. Some people even use reflective material for a truly striking effect.
You'll also need some sort of adhesive. A strong craft glue that works with your chosen materials is a must. Hot glue can be fast, but sometimes leaves visible lines, so a good contact cement or fabric glue might be better for a cleaner finish. Think about what will hold everything together securely for your blue eye samurai hat.
Lastly, don't forget decorative elements. This could mean cord for lacing, perhaps some faux leather strips, or even small metal pieces for accents. These bits and bobs are what give your blue eye samurai hat its unique flair and make it look truly finished. They are, you know, the cherry on top.
Tools to Help You Make a Blue Eye Samurai Hat
Having the right tools makes a real difference in how easy and enjoyable your project feels. You'll definitely want a good pair of sharp scissors or a craft knife. These are essential for cutting your base material cleanly and precisely. A cutting mat is also a very good idea to protect your work surface, as a matter of fact.
A ruler and a pencil are important for marking out your shapes and ensuring everything is straight and even. You might also find a flexible measuring tape useful, especially when dealing with curved sections of your blue eye samurai hat. Accuracy here helps a lot in getting a good final shape.
For applying paint, you'll need brushes of various sizes. A wider brush for large areas and smaller, finer brushes for details are pretty much standard. If you're using spray paint, make sure you have a well-ventilated area and perhaps some newspaper or a drop cloth to protect surfaces. This will help you get an even coat on your blue eye samurai hat.
Clamps or clothes pegs can be surprisingly helpful for holding pieces together while glue dries. Sometimes you need a bit of pressure to ensure a strong bond, and these simple tools can do the trick. They just make sure your blue eye samurai hat doesn't fall apart while it's setting.
Finally, a good work surface that you don't mind getting a little messy is always a plus. Lay down some old newspapers or a craft mat to catch any spills or stray glue. This way, you can focus on making your blue eye samurai hat without worrying about cleaning up too much later.
Getting Started - Prepping Your Blue Eye Samurai Hat Base
Once you've got all your supplies lined up, it's time to actually start building. The first big step is creating the fundamental shape of your hat. This is where your vision for the blue eye samurai hat really begins to take form. It’s a bit like laying the groundwork for a building, you know, everything else rests on this initial structure.
Shaping the Foundation for Your Blue Eye Samurai Hat
Begin by sketching out the basic shapes of your hat onto your chosen base material. Most samurai hats, or jingasa, have a somewhat conical or broad, shallow dome shape. You might want to look at some reference pictures to get a good feel for the proportions. Draw out the main body and any brim pieces separately. Use your ruler to keep lines straight where they need to be, and a compass or a large round object for curves. This initial drawing is very important for your blue eye samurai hat.
Carefully cut out these shapes. If you're using craft foam or felt, sharp scissors will work well. For thicker materials like EVA foam or cardboard, a craft knife with a fresh blade will give you cleaner edges. Take your time with this step; precise cuts lead to a much better looking final blue eye samurai hat. You don't want jagged edges showing up later, do you?
Now comes the shaping. If you're using foam, you can gently heat it with a heat gun or even a hairdryer on a low setting to make it more pliable. This allows you to bend and mold it into the desired curves without creasing. For cardboard, you might need to score lines where you want folds to occur, but be careful not to cut all the way through. This process really helps define the overall silhouette of your blue eye samurai hat.
Once you have the main pieces cut and shaped, it's time to join them. If your hat has a separate brim and crown, you'll glue these together. Apply your chosen adhesive evenly along the edges you're joining. Press the pieces firmly together and hold them in place, perhaps with clamps or clothes pegs, until the glue sets. This is where the hat starts to look like a blue eye samurai hat, rather than just a pile of materials.
Some designs might require multiple layers of material for added stiffness or a more pronounced shape. If this is the case, repeat the cutting and gluing process for each layer, making sure they align perfectly. This adds strength and a more substantial feel to your blue eye samurai hat. It’s almost like building up muscle, in a way, for the hat.
Adding the Color - How to Make Blue Eye Samurai Hat Look Authentic
The "blue eye" part of your blue eye samurai hat is, well, pretty key. This is where your hat truly starts to get its character and that distinctive look. Getting the color right can make all the difference, giving it that authentic or strikingly unique appearance you're aiming for. It's not just about slapping on some paint, you know, it's about choosing and applying it thoughtfully.
Choosing the Right Blue for Your Blue Eye Samurai Hat
When picking your blue, think about the specific shade that speaks to you. Do you want a deep, almost midnight blue that suggests mystery and power? Or perhaps a brighter, more vibrant cobalt blue that really pops? Maybe a softer, dusty blue for a more weathered or subdued look? There are so many blues out there, as a matter of fact, and each one tells a different story for your blue eye samurai hat.
Consider how the blue will interact with any other colors you plan to use for accents or details. A strong blue might need a contrasting color, like a gold or silver, to really stand out. If you're going for a more subtle design, a slightly muted blue might work better with earth tones. Hold up different paint samples against your hat material to see how they look in different light. This helps you visualize the final blue eye samurai hat.
Also, think about the finish. Do you want a matte blue, which can look very traditional and absorb light? Or a glossy blue, which will reflect light and give your blue eye samurai hat a more modern or even slightly futuristic feel? The finish can change the entire perception of the color. It's a small detail, but it can make a big impact, honestly.
Applying the Finish to Your Blue Eye Samurai Hat
Before you start painting, make sure your hat base is clean and free of dust or oils. Any surface imperfections can show through the paint, so a smooth, clean base is pretty important. If your material is porous, you might want to apply a primer first. This helps the paint adhere better and gives you a more even color application on your blue eye samurai hat.
Apply your paint in thin, even coats. It's always better to do multiple thin coats than one thick one. A thick coat can drip, streak, or even crack as it dries, which you definitely don't want on your blue eye samurai hat. Allow each coat to dry completely before applying the next. This patience will pay off with a much smoother, more professional-looking finish.
If you're using spray paint, work in a well-ventilated area, preferably outdoors, and use sweeping motions to apply the paint. Keep the can a consistent distance from the hat to avoid splotches or uneven coverage. This technique helps you achieve a uniform color across your blue eye samurai hat.
For adding the "eye" detail, you might use a stencil or freehand it. If you're painting it on, use a smaller brush for precision. If you're attaching a separate piece of material for the eye, make sure it's cut perfectly and glued securely. The "eye" is a focal point, so make sure it looks crisp and intentional on your blue eye samurai hat. It’s what gives the hat its specific identity, really.
Once all the paint is dry, you might consider adding a protective sealant. A clear matte or gloss spray sealant can help protect your paint job from scratches, moisture, and fading over time. This step helps preserve the vibrant blue color of your blue eye samurai hat for longer. It's like putting a little shield on it, you know?
Decorating Your Blue Eye Samurai Hat - What Details Matter?
Beyond the main color, the little decorative touches are what truly bring your blue eye samurai hat to life. These are the elements that can tell a story, add texture, or simply make your hat look more intricate and complete. It's where you can really let your personal style shine through, actually. What sorts of things can you add to make it special?
Embellishments for Your Blue Eye Samurai Hat
Think about traditional samurai hat elements. Often, you'll see lacing, sometimes in contrasting colors, or perhaps some sort of woven pattern. You could use a thin cord or faux leather strips to create these details. Measure carefully and use a strong adhesive to secure them. These details can add a lot of visual interest to your blue eye samurai hat, giving it a more authentic feel.
Metal accents, even faux ones, can also look very striking. Small studs, rings, or even cut-out shapes from metallic cardstock can be attached to the hat. These add a bit of sparkle and a sense of strength. Make sure they are firmly attached so they don't fall off later. These little bits of shine can really catch the light on your blue eye samurai hat.
Consider the inner lining, too. While not always visible, a comfortable and perhaps aesthetically pleasing inner lining can make the hat much more enjoyable to wear. A soft fabric like cotton or silk can be glued or sewn into the inside. This small detail shows a level of thoughtfulness in your blue eye samurai hat construction.
If you want to add a more personal emblem or crest, now is the time. This could be a simple geometric shape, a stylized animal, or something entirely unique to you. Cut it from a contrasting material or paint it directly onto the hat. This personal touch makes your blue eye samurai hat truly one-of-a-kind. It's your signature, in a way.
Feathers, while not strictly traditional for all samurai hats, can add a dramatic flair. If you choose to use them, select sturdy ones that won't easily break. Secure them firmly, perhaps by inserting them into a small hole and gluing them in place, or by attaching them to a small base that can be glued to the hat. They can give your blue eye samurai hat a sense of movement and grandeur.
Putting It All Together - Assembling Your Blue Eye Samurai Hat
Now that you've got your main pieces shaped and colored, it's time to bring everything together into a cohesive whole. This stage is where all your individual efforts merge to form the complete blue eye samurai hat. It’s a pretty satisfying part of the process, seeing it all come together, you know?
Final Touches for Your Blue Eye Samurai Hat
Start by carefully reviewing all your painted and decorated pieces. Are there any spots that need a touch-up? Are all the glued seams holding strong? This is your last chance to fix any minor imperfections before the final assembly. A quick check can save you a lot of trouble later with your blue eye samurai hat.
If your hat has multiple layers or separate brim and crown pieces, align them precisely before applying the final adhesive. Use guide marks if necessary to ensure everything is centered and straight. This precision helps your blue eye samurai hat look professional and well-made.
For any lacing or cord details, make sure they are evenly spaced and taut. Loose lacing can look messy, so take your time to get it just right. A small dab of glue at the ends can prevent fraying and keep everything neat on your blue eye samurai hat.
If you're adding any internal padding or a head-fitting band, install that now. This makes the hat more comfortable to wear and helps it sit properly on your head. Measure your head circumference or the intended wearer's head to ensure a good fit. This small detail can make a big difference in the wearability of your blue eye samurai hat.
Finally, give your blue eye samurai hat one last overall inspection. Look at it from all angles. Does it look balanced? Are there any visible glue spots or smudges? A clean, finished look is what you're aiming for. Sometimes, just stepping back for a moment and looking at it from a distance can help you spot things you missed up close, basically.
Tips for a Great Blue Eye Samurai Hat
When you're making something like a blue eye samurai hat, a few pointers can really help you along. These aren't strict rules, but more like helpful suggestions to make your crafting experience smoother and the final product something you're truly proud of. It’s about making the process enjoyable, you know?
First off, don't be afraid to experiment with different materials. While we've talked about foam and felt, maybe you have access to something else that could work, like a stiff leather or even a specialized paper. Sometimes, trying something a little different can lead to a really unique blue eye samurai hat. Just be sure it can hold its shape, that's pretty important.
Practice your cuts and glue applications on scrap pieces of material first. This lets you get a feel for how your tools and adhesives work before you apply them to your actual hat pieces. It's like a little warm-up, and it can save you from making mistakes on your main project. This is especially true for intricate parts of your blue eye samurai hat.
Take breaks. Seriously, sometimes stepping away from your project for a little while can give you a fresh perspective. You might come back and see a solution to a problem you were stuck on, or spot a detail that needs adjusting. It helps prevent frustration and keeps the fun in making your blue eye samurai hat.
Consider the weight of your materials. A hat that's too heavy won't be comfortable to wear for long periods. Try to balance durability with lightness. This is particularly important if you plan to wear your blue eye samurai hat for an event or costume, you know?
Don't rush the drying times for glues or paints. Patience here is a real virtue. Trying to speed things up can lead to weak bonds or smudged paint, which means more work in the long run. Let everything cure properly to ensure your blue eye samurai hat holds up well.
Finally, remember that perfection isn't the goal, especially if this is your first time. The goal is to create something you enjoy making and that expresses your creativity. Any little imperfections just add to its unique charm, basically, making it truly yours. Every blue eye samurai hat will have its own story.
Troubleshooting Your Blue Eye Samurai Hat - What If Things Go Wrong?
It's pretty common for things not to go exactly as planned when you're making something by hand. That's just part of the creative process, you know? Don't get discouraged if a cut isn't perfect or if the paint smudges a little. Most issues can be fixed or worked around, especially when you're crafting your blue eye samurai hat. What should you do if something goes a bit sideways?
If your cuts aren't perfectly straight, don't fret too much. For minor wobbles, you can often trim them carefully with a sharp craft knife after the initial cut. If it's a larger issue, consider if you can hide it with an embellishment or if you need to recut that specific piece. Sometimes, a slightly uneven edge can be disguised by adding a decorative trim to your blue eye samurai hat.
Paint smudges or uneven coats can happen to anyone. If the paint is still wet, you might be able to gently wipe it off with a damp cloth, but be careful not to spread it. If it's dry, you can often paint over it with another thin coat. For very noticeable errors, you might need to sand down the area gently (if your material allows) and repaint. It's a bit like a do-over for your blue eye samurai hat's color.
If glue isn't holding, first check if you used the right type of glue for your materials. Sometimes, different materials need different adhesives. Reapply glue, making sure you use enough, and apply pressure for a longer period. Clamps or heavy books can be really helpful here. A weak bond is something you definitely want to fix on your blue eye samurai hat.
If your hat isn't holding its shape as well as you'd like, you might need to add some internal reinforcement. This could be extra layers of your base material, or even thin wire or craft sticks glued along key structural points. This gives your blue eye samurai hat more rigidity and helps it keep its form.
Sometimes, a piece just doesn't fit quite right. Before forcing it, take a moment to see if you can trim one of the pieces slightly to make it fit better. If it's a gap, you might be able to fill it with a bit of extra material or a strong adhesive, then paint over it. It's all about adapting, really, when you're making your blue eye samurai hat.
![[100+] Blue Eye Samurai Wallpapers | Wallpapers.com](https://wallpapers.com/images/hd/blue-eyed-samurai-gaze-30odd6lqxjz59mdt.jpg)
Detail Author:
- Name : Prof. Randall White IV
- Username : qgleason
- Email : ralph.thompson@paucek.org
- Birthdate : 2006-10-10
- Address : 40642 Skiles Wells Marktown, AZ 69259
- Phone : +1-640-505-3877
- Company : Satterfield, Wintheiser and Thompson
- Job : Dredge Operator
- Bio : Voluptate eligendi voluptas nam voluptatum quisquam. Nostrum voluptatem sed quasi quo ut. Adipisci non nulla perspiciatis eaque eos. Voluptatem dolore nobis excepturi nulla voluptatum.
Socials
linkedin:
- url : https://linkedin.com/in/everettetillman
- username : everettetillman
- bio : Sunt rerum aperiam sunt accusantium.
- followers : 1790
- following : 99
instagram:
- url : https://instagram.com/tillman2024
- username : tillman2024
- bio : Sequi cupiditate voluptatem aliquam dolore veritatis consequatur. Eos at illo omnis impedit.
- followers : 2320
- following : 1317
